Best Methods Of Keeping My Spotify Music In The Cloud
Storing a lot of your stuff has never been safer and easier before the availability of iCloud. Since iCloud was announced capable to cater storing files, keeping the copies of saved photos, music and notes has become safer and simpler for users. It also provides a convenient way of accessing them whenever you want to.
Since music is allowed to get stored, you must be wondering if your favorite Spotify Music playlists can be saved as well. Unfortunately, this is not possible for the service as its files are protected with DRM. But with the solution that I am about to tackle below, you will be able to save all the songs, playlists, albums and podcasts that you want on different audio formats that are supported on many devices. Let us see below the perfect way of keeping my Spotify music in the cloud.
Contents Guide Part 1. How to Download Spotify Music for Backing up on iCloud?Part 2. How to Transfer Spotify Music to iCloud Drive?Part 3. Summary
Part 1. How to Download Spotify Music for Backing up on iCloud?
Saving Spotify on your iCloud is only possible if you will be using a professional converter to get the files. This is only possible if the tool you’ve selected is capable of both download and conversion, plus the DRM removal from them. Getting the Digital Rights Management (DRM) out of the files is very much important in order to proceed with downloading them offline and transferring them in the cloud.
When it comes to the procedures that are just mentioned, the best that you can use is AMusicSoft Spotify Music Converter. This tool is definitely capable of all the processes and has the capability to produce the best results as if they were the original copies. It can convert Spotify tracks to MP3, WAV, FLAC, AAC, AC3 and M4A. Right after having the final converted copies, it will be possible for you then to transfer them into other devices for streaming. And since all of these formats are playable in all kinds of players, it will not be a hassle to select the player to use in playing them.
With the 5x faster speed, AMusicSoft can finish all the procedures up to getting down the results of conversion. It also has a very neat interface that can be understood really well by all beginners. Let us see below the complete steps in using AMusicSoft Spotify Music Converter and proceed with keeping my Spotify music in the cloud.
- Open the browser on your computer to navigate to the website of AMusicSoft. From here, click the Download button right next to the music converter. Once download is finished, install it on your computer right away.
- Launch AMusicSoft Spotify Music Converter and then start adding the tracks by utilizing the copy and paste method. You can also just drag and drop the files if it seems easier for you.
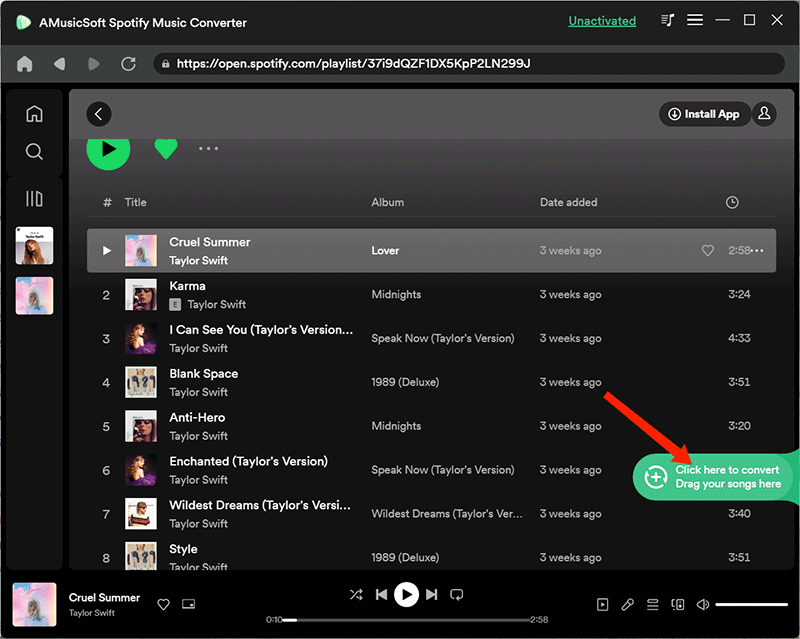
- From the available formats mentioned, select one. The end folder must be chosen as well to keep the results once conversion is done.

- Tap the Convert button and get started with the procedure.
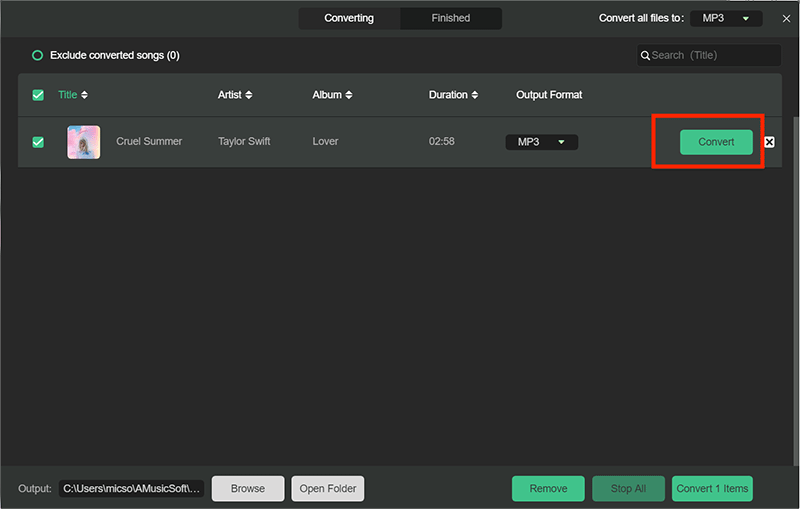
- Lastly, head to the Converted menu to check the results of conversion and then download them on your device.
Now you can save them not only on iCloud but also download music to SanDisk Clip Sport and others MP3 players.
Part 2. How to Transfer Spotify Music to iCloud Drive?
Now that you already have the converted Spotify tracks saved on your local device, keeping my Spotify music in the cloud will then be possible. Let me show you two methods on how to keep your files on your iCloud.
Add Spotify Music to iCloud on Mac
Now if you have some idea about keeping my Spotify music in the cloud, let’s start with the most basic operation of uploading a file through your computer.
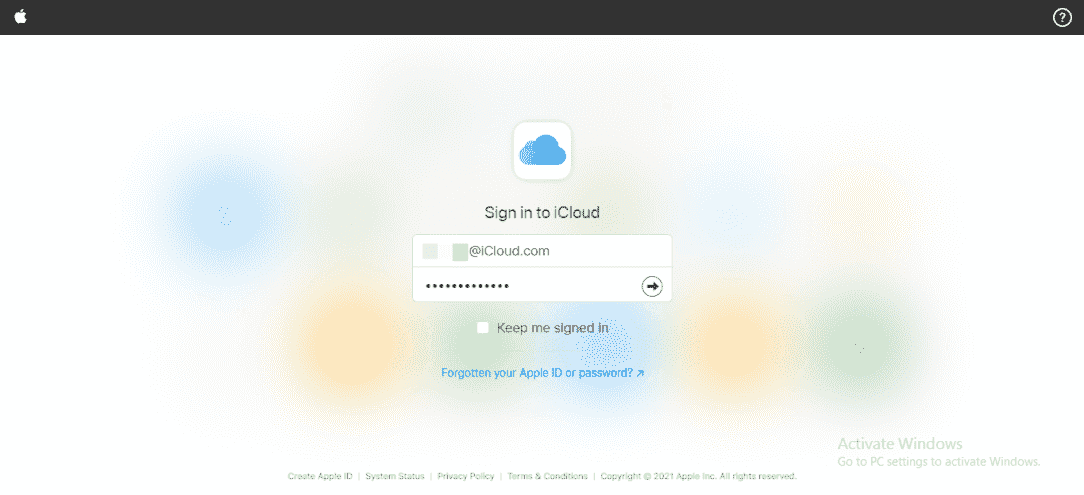
- Sign into iCloud.com using your Apple ID credentials.
- Click on the iCloud Drive option to open the Drive.
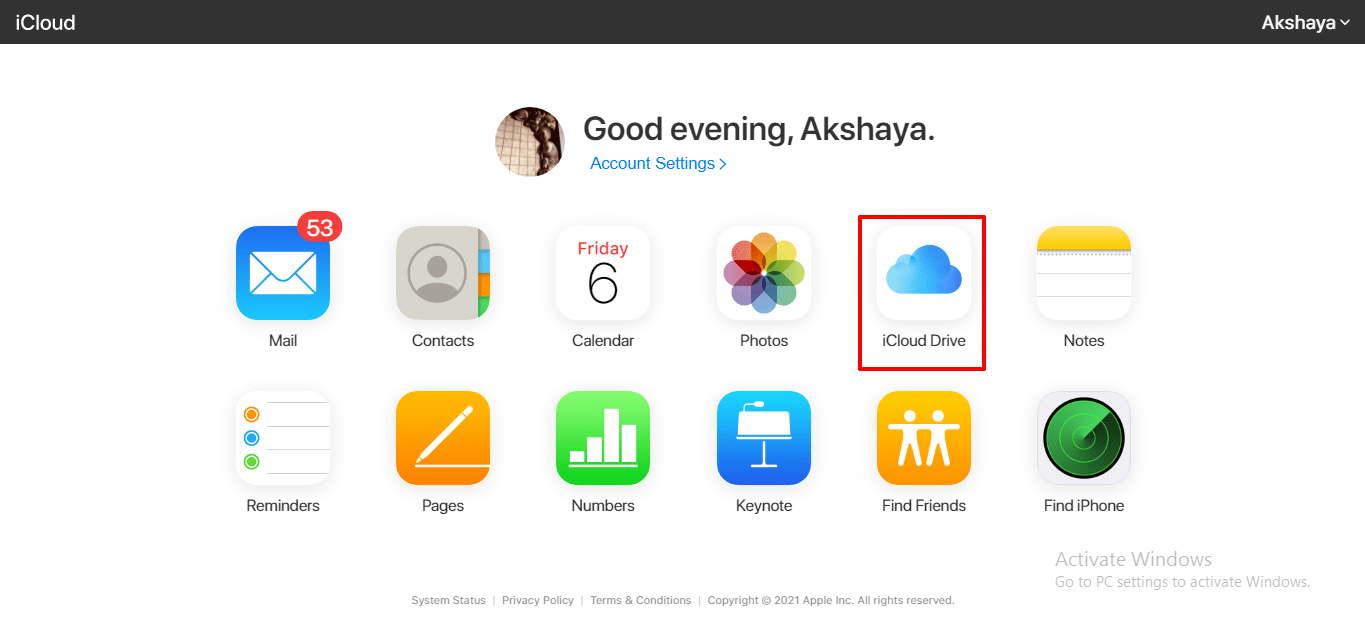
- Create a new folder for putting your music.
- Open the music folder, click the upload symbol, and choose converted Spotify songs to upload from your computer or removable disk.
![]()
- The files will be uploaded in no time to iCloud Drive.
Add Spotify Music to iCloud on iOS
Knowing about the way for keeping my Spotify music in the cloud, you can definitely back up your favorites without a problem. Using the Files app, you can directly transfer the files from your iPhone/iPad storage to iCloud Drive. Here are the simple steps you need to follow.
- Transfer the converted Spotify music from your computer to your iPhone/iPad via a USB cable.
- Open your iOS device and then go straight to the Settings app.
- Click on Apple ID and turn on iCloud Drive from Settings.
- Open the Files app on your iOS device.
- Click on On My iPhone (or On My iPad).
- Copy the converted Spotify music files.
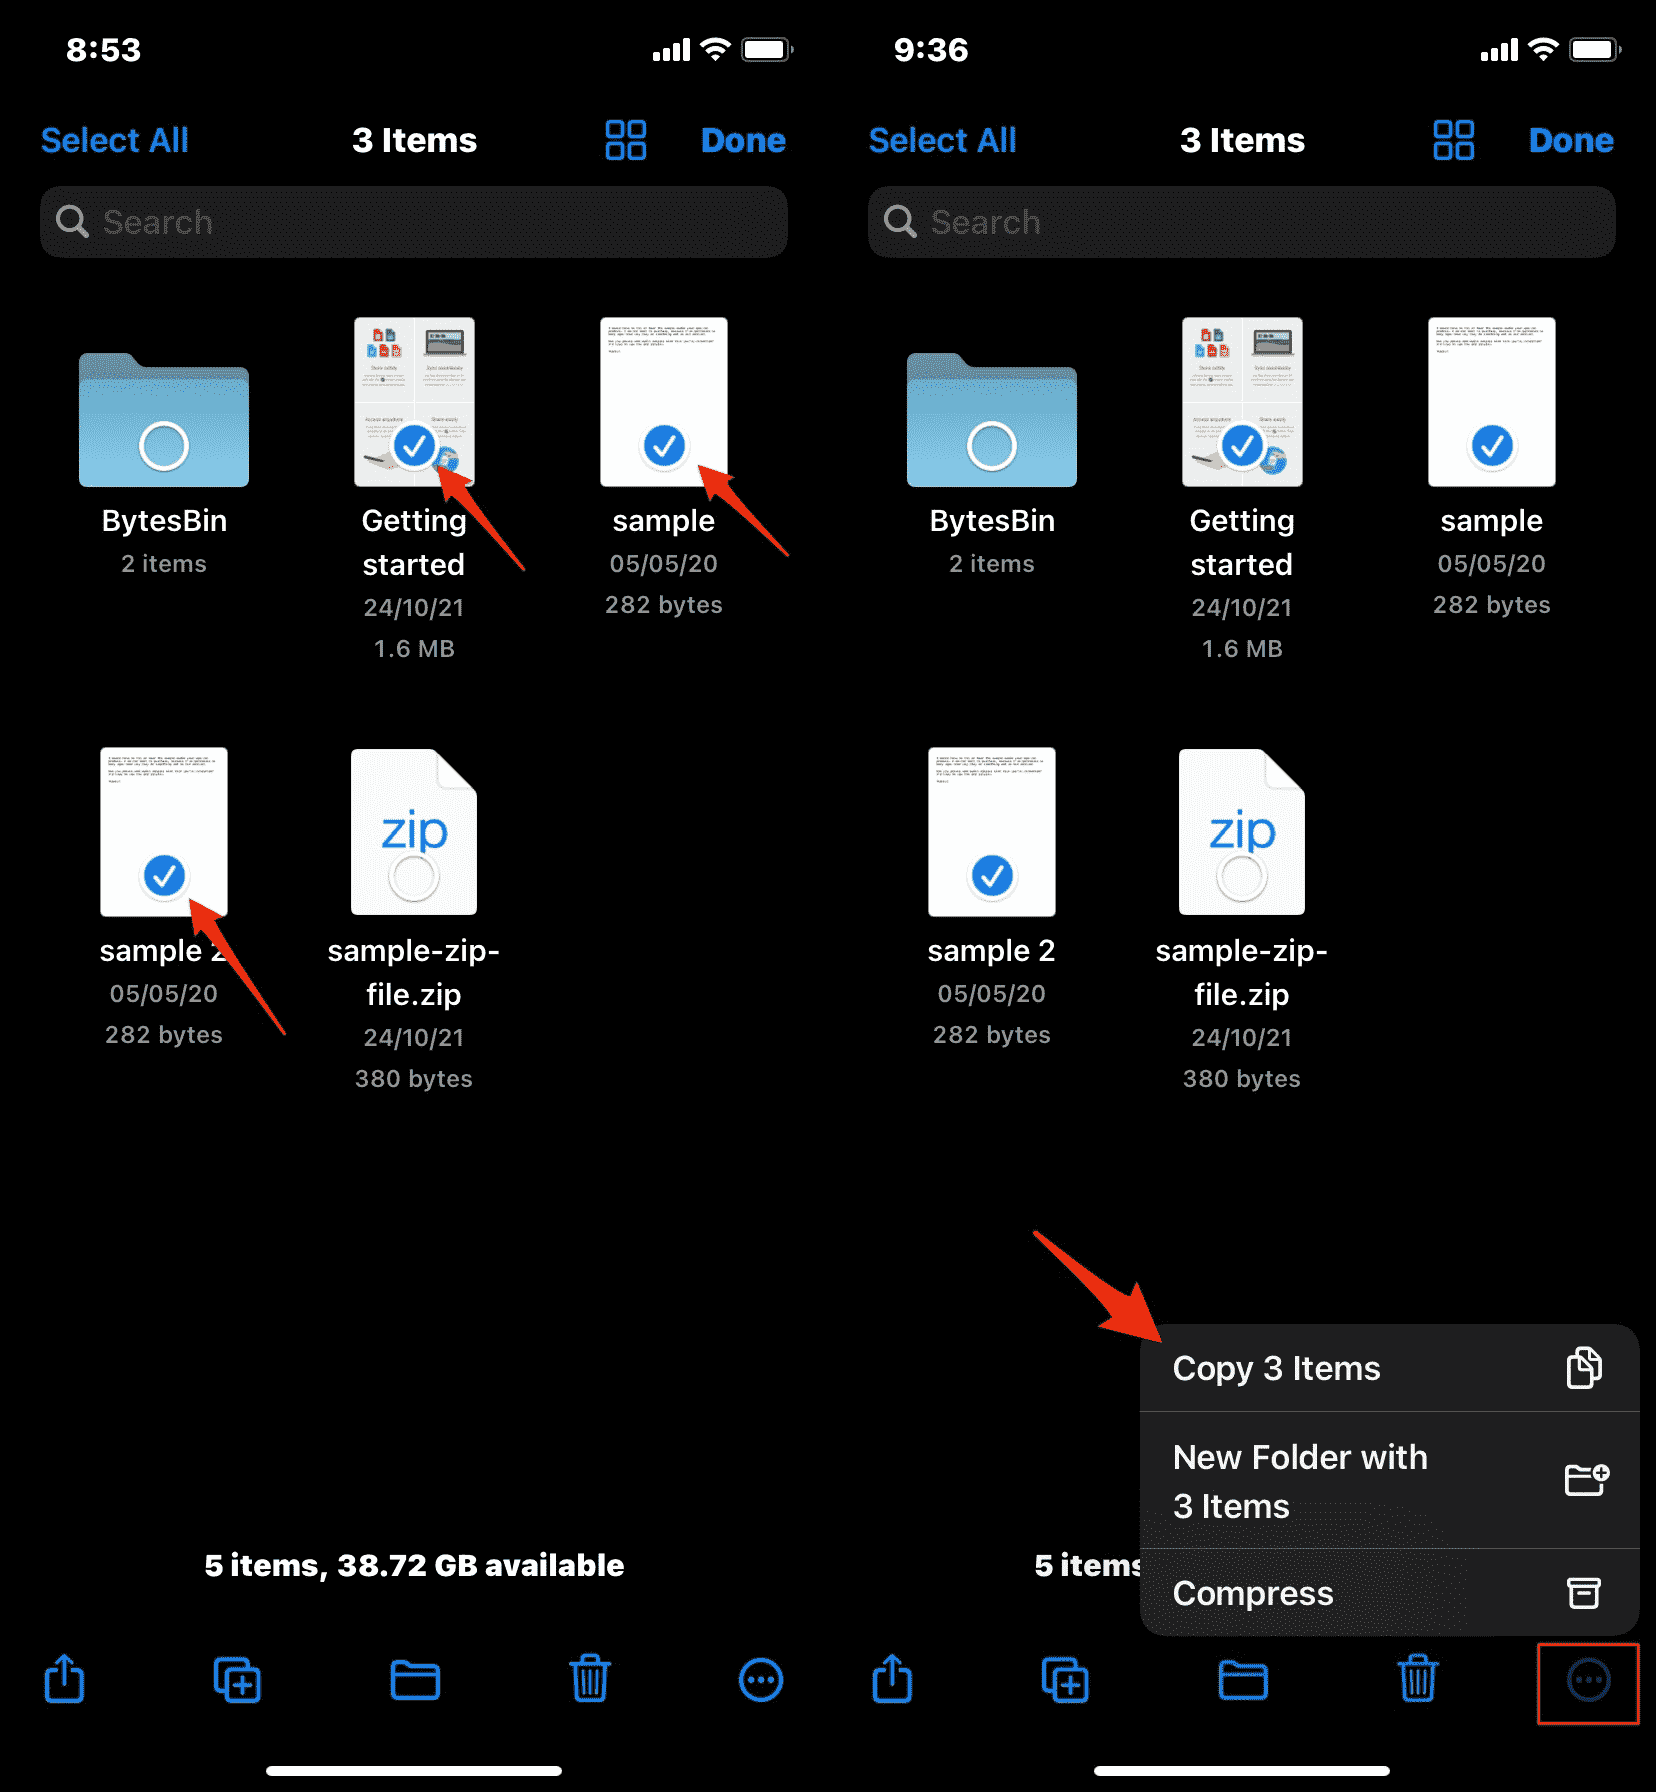
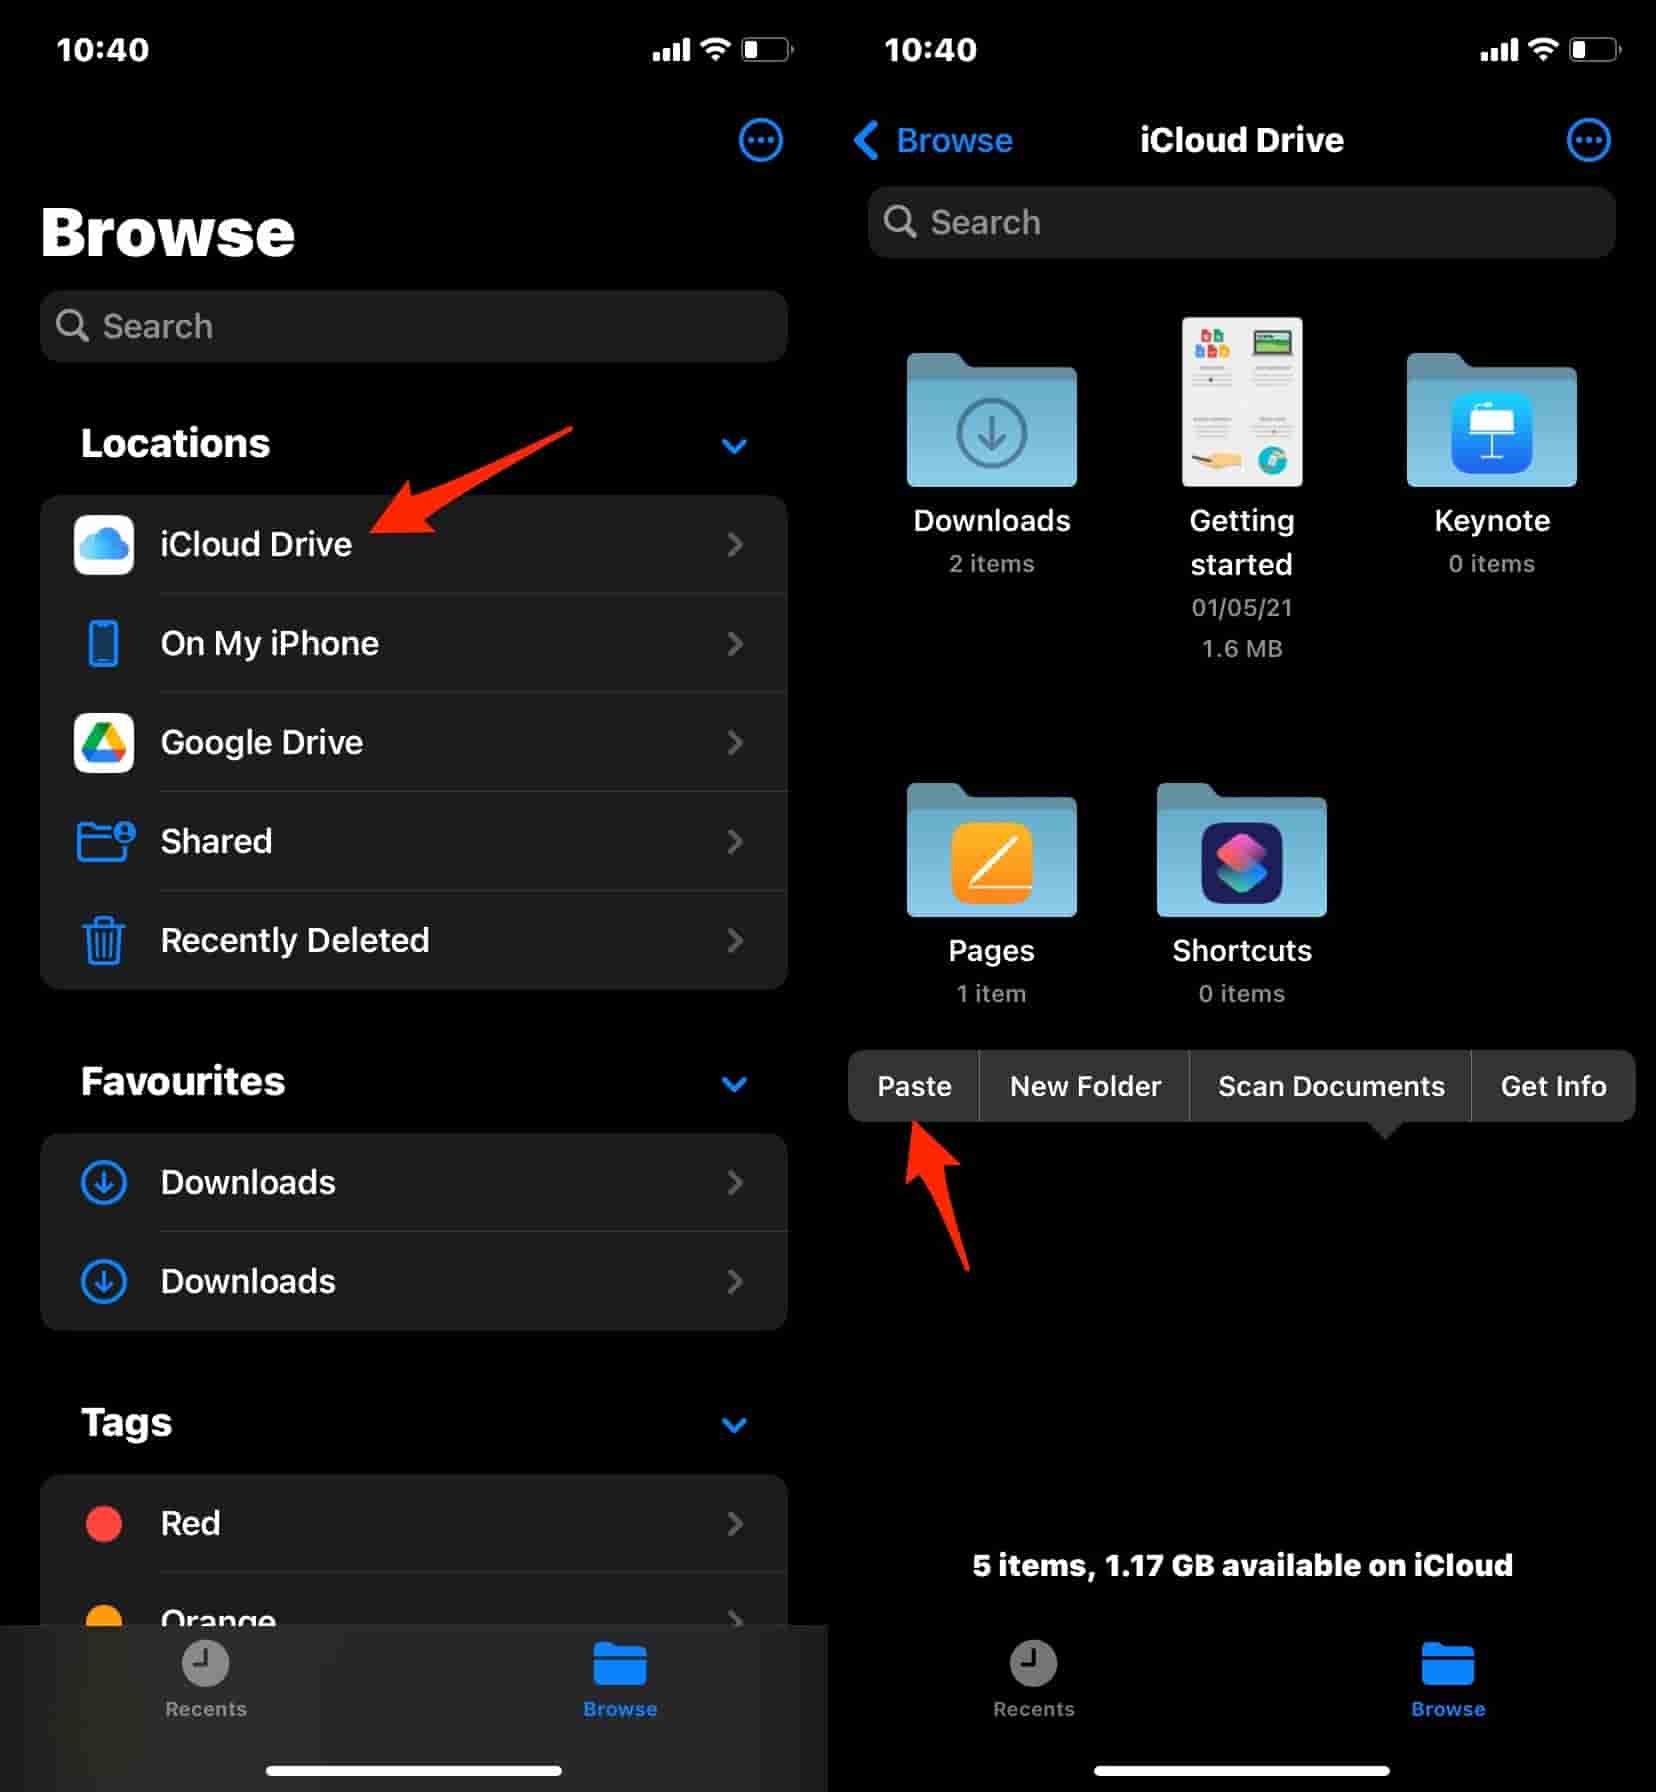
- Now open iCloud Drive and select the folder to paste the copied files.
- Long press to paste the file and hit Paste here.
- The music files will be backed up to iCloud.
Part 3. Summary
Wit the availability of the iCloud services, accessing music on all devices has been made possible and easy. Losing your copy of them wouldn’t be an issue as well since this is also a good way of backing up music. With the help of AMusicSoft Spotify Music Converter, keeping my Spotify music in the cloud is now doable for all users. Follow the given guide above on how to use this tool when it comes to converting and downloading Spotify into accessible formats. The two methods to save music on iCloud was discussed above as well, so, all that is left to do, is to properly do the given procedure step-by-step
People Also Read
- Spotify Premium For Free Hack To Enjoy Music Without Limit
- Guide On Saving Spotify Music To An External Hard Drive
- Tips For Managing Storage Space Of Spotify Music
- How To Make A Blend Playlist On Spotify? Spotify Blend Guide
- Premium Duo: How To Get a Spotify Couples Plan?
- All-in Guide: How To Change Album Cover On Spotify
- How To Clear/Reset Spotify History Or Recently Played?
- How To Spotify Block Artists On Desktop/Mobile
 About The Author
Robert Fabry is an ardent blogger, and an enthusiast who is keen about technology, and maybe he can contaminate you by sharing some tips. He also has a passion for music and has written for AMusicSoft on these subjects.