Removing DRM from iTunes Music Is Easy
If you had bought songs from the iTunes Store in the past, you know that they’re protected by FairPlay. This is the digital rights management or DRM technology created Apple. It’s not exactly fool-proof since there ways of removing DRM from iTunes music. However, it is undoubtedly annoying. You cannot play the songs you had purchased on any other device.
You would have to remove the DRM first to be able to enjoy and listen to the songs on other devices. The good thing is that there are ways to remove the DRM from the song you had purchased from the iTunes Store. Keep on reading to learn more about them.
Contents Guide Part 1. What You Should Know About iTunes MusicPart 2. Removing DRM from iTunes Music with AMusicSoft Apple Music ConverterPart 3. Removing DRM from iTunes Music using RequiemPart 4. Removing DRM from iTunes Music via Fair GamePart 5. Conclusion
Part 1. What You Should Know About iTunes Music
As previously mentioned, iTunes has changed over the years. Yes, it has changed for the better. It’s been almost about eleven years since Apple remove the DRM from its iTunes music. Now, you can download DRM-free songs from iTunes. That’s pretty. However, you might wonder about the songs you had bought before 2009. Those are still protected by DRM.
This article will show you ways of removing DRM from iTunes Music. That way, all the songs you had downloaded before 2009 can finally be played on your other devices.
Part 2. Removing DRM from iTunes Music with AMusicSoft Apple Music Converter
Take a look at the three easy ways to remove the DRM from your iTunes music below. The AMusicSoft Apple Music is a powerful tool to use for the purpose of removing DRM from iTunes Music. This is an efficient multifunctional program that also removes DRM from audiobooks as well.
While there are a lot of programs out there, the simplicity of this program is what’s going to make it a preferred choice among audiophiles. It also offers a couple of features that allow you to tweak the settings of your output.
Hence, you are not only able to convert and download a song with it, but you are also able to create a better quality version of it. The steps on how to use the AMusicSoft Apple Music Converter are listed below. Take a look at them to learn more about this easy-to-use program.
- Download and Launch the AMusicSoft Apple Music Converter
- Add iTunes Song
- Change Settings and File Format of Output
- Download and Enjoy
Read the detailed steps below to gain a better understanding of how to fully maximize the use of the AMusicSoft Apple Music Converter.
Step 1. Download and Launch the AMusicSoft Apple Music Converter
The AMusicSoft Apple Music is a program that has to be installed on your computer. To do so, you need to go to their website to download it. There’s no need to worry about downloading any other program bundled with it. Rest assured that you are on a trustworthy website. After downloading it, install it.
Step 2. Add iTunes Song
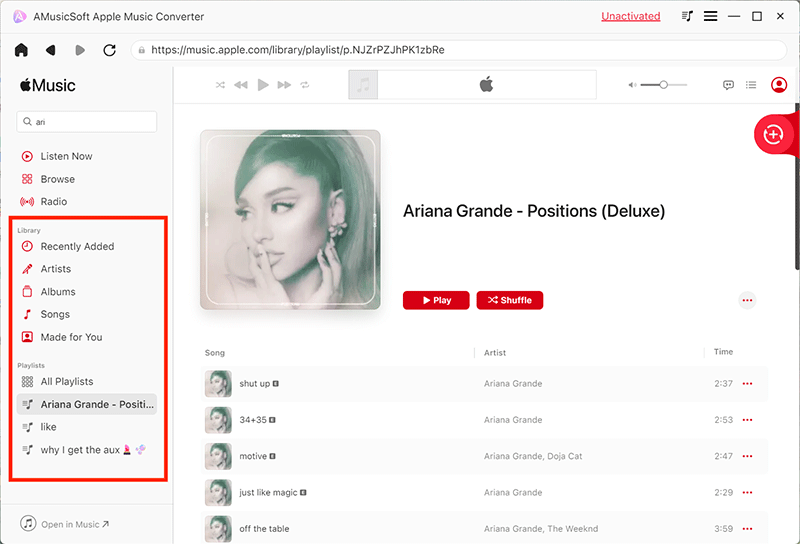
Now that you are seeing the AMUsicSoft program on your screen, take a look at the left-hand side of the program. Look for Music and click on it to make all the songs from your iTunes to come out on your main screen. Once you see all your iTunes songs, click the one you want to strip the DRM from.
As you can see, there is no need for you to even launch your iTunes. You can do everything on the AMusicSoft Apple Music Converter.
Step 3. Change Settings and File Format of Output
With the songs added to the program, you can now change the settings and the file format of your output. Make sure to set a destination folder for your output as well.
Step 4. Download and Enjoy
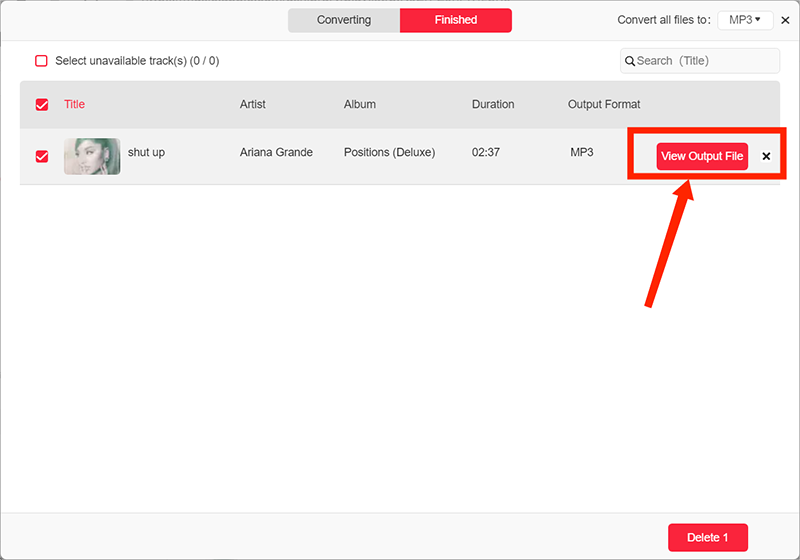
Now, you can download your songs. In the process of downloading, the DRM is naturally stripped off from the songs. 
Part 3. Removing DRM from iTunes Music using Requiem
This is a free program that you can use as well. The steps below will show you how to use it.
Step 1. Authorize your Computer
Considering that you have already downloaded and installed Requiem, you need to make sure that you authorize your computer. To do this, open iTunes and click on Store on the top menu. Select Authorize This Computer from the drop-down menu. Requiem will only work with songs that have been authorized by your computer.
Step 2. Open Requiem
Close iTunes and launch Requiem. Once it’s launched it will automatically scan songs on your iTunes. As it scans, it will automatically remove the DRM. You will see DRM removed opposite the songs.
Step 3. Check Song Information
After the scanning is done, open your iTunes to check on the song that you had just removed the DRM from. You can either look at the Kind column on iTunes and see if the song is in the Purchased AAC format. The AAC file is the DRM-free audio file that’s now available on iTunes. You can also click on the song to check the information. Before you delete the DRM-copy of your iTunes song, make sure the AAC file if working.
Part 4. Removing DRM from iTunes Music via Fair Game
This is another freeware that you can use to remove the DRM from your iTunes Music. The steps below will show you how it’s used.
- Make sure the feature Access for assistive devices is enabled. Also, make sure to select Place click in Movie Timeline.
- Choose the songs on your iTunes Music. Then click on the Process songs tab.
- Just wait for the freeware to process your songs. It will only take a couple of seconds for it to remove the DRM. Once it’s done check if the DRM-free song is working.
Part 5. Conclusion
Don’t ignore those iTunes songs you had downloaded in the past. You can still remove the DRM from those songs. If you want the safest way of doing it, then you have to use the AMusic Soft Apple Music. That way, you’re sure that your outputs are working properly.
Have you removed the DRM from your iTunes songs? Share your story with us. We would love to hear from you.
People Also Read
Robert Fabry is an ardent blogger, and an enthusiast who is keen about technology, and maybe he can contaminate you by sharing some tips. He also has a passion for music and has written for AMusicSoft on these subjects.