A Guide on How to Move iTunes Library to External Hard Drive
Perhaps your iTunes consume most of your local storage and you want to free some space or you just want to make a backup copy of your iTunes for safety purposes that’s why you want to learn how to move iTunes Library to external hard drive.
For which reasons you have, you are just right in time because this article is what you are looking for. We will be going to provide you step-by-step information that you need on how to move iTunes Library to external hard drive. So, what are we waiting for? Let’s get the ball rolling!
Contents Guide Part 1. How Do I Move My iTunes Library to External Hard Drive?Part 2. How to Get iTunes Music on Any Devices?Part 3. To Sum Everything Up!
Part 1. How Do I Move My iTunes Library to External Hard Drive?
So, how to move iTunes Library to external hard drive? Before we begin, Let’s prepare first the things that we need: First is your external hard drive, make sure that is functioning and second is the USB cable which we will use to connect your external hard drive to your Mac.
Also make sure that your power source is sufficient to prevent interruptions, so the process will be smooth. In addition, I also advised you to back up your Mac first before we make any changes, this is to secure your data and I think it is also a great idea to do. If everything is all set, let us now begin how to move iTunes Library to external hard drive.
Step 1. Consolidate or Merge Your Library First
For you to make sure that all of the iTunes content that you wanted to transfer will be complete, you need to consolidate your files first before transferring it to your external hard drive.
If you are doing this now and then and you think that you have consolidated your files already, I guess it is better to check again before transferring just to be sure, so that you won’t miss anything and by doing this it will save much time than to repeat the same process all over again. I provided below the steps on how to consolidate your iTunes.
- Open your iTunes on your Mac.
- Select “File” that is located at the top-left portion of your screen.
- Look for “Library” from the dropdown menu.
- Once on the secondary menu, Click Organize Library.
- Check the box alongside the Consolidate Files to merge your library.
- Finally, Click “OK” to confirm.
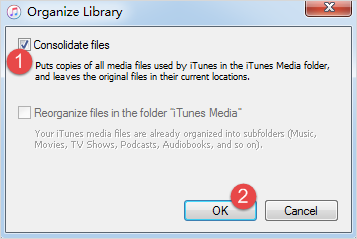
By doing this process, it will provide a copy for all of your files that are present on your iTunes media folder while leaving the original files in their present location, I will discuss more this as we go on how to move iTunes Library to external hard drive
Step 2. Transferring Your iTunes Library to Your External Hard Drive
After consolidating your iTunes, your library is ready to go! In this step, I will now actually show you how to move iTunes Library to external hard drive. There are 9 steps that you should do and I listed them below:
- Close or Exit your iTunes.
- By using the provided USB cable of your external hard drive, connect it now to your Mac
- Select on Finder to launch a Finder window.
- Choose the local hard drive of your Mac.
- Search your Music folder and open it.
- Click iTunes and then drag your iTunes folder to your external hard drive.
- When prompted, click Authenticate to allow your iTunes folder to be transferred to your external hard drive.
- Input your administrator password for validation
- Click OK to confirm.
Take note that this process may take time to be complete, it could take up to 1 to 2 hours for this process to finish depending on the size of your iTunes library being transferred. The smaller the size of your media files the shorter time it will be complete.
Step 3. Redirect Your iTunes to Its New Location
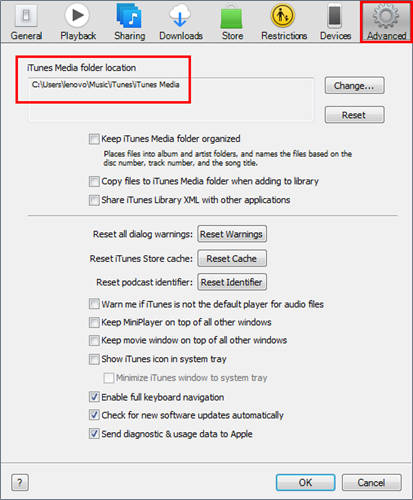
One important thing you should do or need to check on how to move iTunes Library to external hard drive is redirecting or set your iTunes app to its new path which is your external hard drive instead of your local drive. This is essential because you can’t access your iTunes Library on your external hard drive if you didn’t do this and also, this will help you confirm if the media file that you have transferred is in your external hard drive. Just follow the steps that I provided below so you can redirect your iTunes Library to your external hard drive.
- Open your Music while holding down the Option Key
- Select Choose Library once a new window appears.
- Choose your external hard drive in the Finder sidebar that is under Devices
- Select iTunes.
- Then, click on Choose
- Click on Tunes Library.itl.
- Select Choose
- Enter your preferred file name on Save As.
- Finally, Click Saveto complete.
Take note that you can switch back again and access your iTunes Library on your local storage by following the steps above whenever you feel like not unless you had deleted your iTunes in your local storage.
Step 4. Ways to Confirm If It Worked
After doing that steps from 1 to 3 above that I provided correctly, your iTunes should look similar once your launch prior to making any changes. You can also counter check if the migration was successful by looking at the information of any file that you choose. For you to do that, see the steps given below.
- Open your iTunes.
- Choose any available song.
- Either control-click or right-click your selected song.
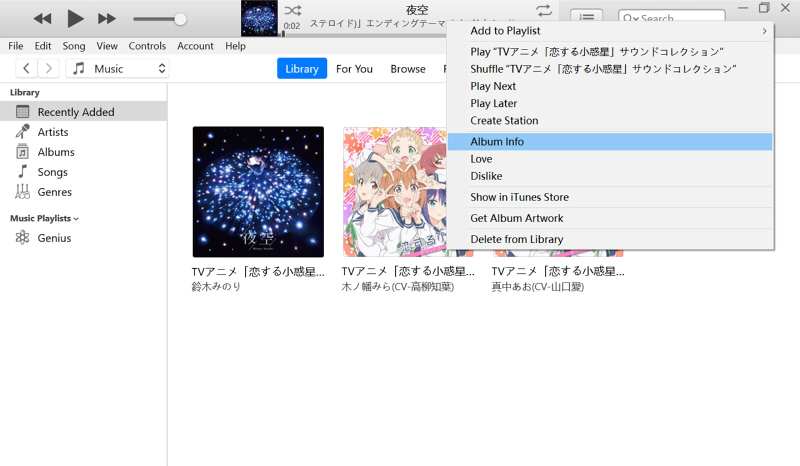
- From the drop-down menu, choose to Get info.
- Select the File Tab.
- You can confirm by checking the Location of that content. It will show that the storage is now /Volumes/external hard drive name/ rather than Users/local hard drive name/, if so, it means that redirecting your iTunes Library is successful.
- Once confirmed, you can click OK to exit.
Step 5. Clearing Your Old iTunes Library
Once you made sure that you already copy and transfer all of your iTunes Library, as well confirmed its location after redirecting your iTunes.you should do or need to check on how to move iTunes Library to external hard drive. You can now clear up your local storage by deleting your iTune Library so that you can have enough space on your Mac. So, how to delete your iTunes Library on your local storage? Just follow the steps provided below.
- Quit or Exit your iTunes.
- Select Finderfor you to launch a Finder window.
- Choose the hard drive of your Mac
- Select the Music folder.
- Click on iTunesand you may drag it directly to the trash.
Take note that you may skip step 5 if you just want to transfer a copy of your iTunes to your new computer. But if you want to clear everything from your old computer then you may do so.
Once you deleted your iTunes library on your local storage you can no longer access your iTunes library there. So, make sure that your external hard drive is connected so you can access your iTunes library, otherwise, iTunes can’t locate the content. If ever this happens, just close your iTunes, make sure your external hard drive is connected, and try to reopen your iTunes.
Step 6 (Elective). Transferring iTunes Library to Your New Mac.
Since your iTunes library is now on your external hard drive, you can also use it now if want to transfer it to your new Mac and will be much easier to transfer. Here are the steps that you should do.
- Make sure your iTunes is closed on your new Mac.
- By using a USB cable, connect your external hard drive to the new Mac.
- Open your external hard driveonce it becomes visible on the screen of your new Mac.
- Select Finder to open a Finder window on your new Mac.
- Choose the hard drive of your new Mac
- Select and click on the Music folder.
- Simply drag the iTunes folderfrom your external hard drive to your new Mac’s Music folder.
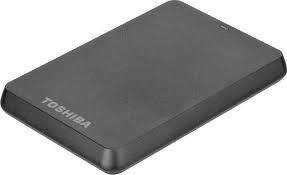
Once done, you have to redirect your iTunes on your new Mac.
- Open your Music while holding down the Option Key
- Select Choose Library once a new window appears.
- Choose your external hard drive in the Finer sidebar that is under Devices
- Select iTunes.
- Then, click on Choose
- Click on Tunes Library.itl.
- Select Choose
- Enter your preferred file name on Save As.
- Lastly, Click Saveto complete.
Part 2. How to Get iTunes Music on Any Devices?
Since we have discussed how to move iTunes Library to external hard drive, do you also want to know how to get iTunes Music on any device? If so, I will give you the tips in this section. Most of us know that it is not easy to transfer tracks on iTunes the same with Apple Music to any device unless it is compatible.
Media files from these music streaming services are also encrypted with protection making it more difficult to access to another device.
So, for you to do that, you will be needing a special tool that will evade these two reasons. The one that I would definitely recommend is the AMusicSoft Apple Music Converter.
This software has many features, some of these are: it can convert songs to any format such as MP3, WAV, etc., it has a conversion speed of 16x even with such speed it won’t affect the quality of the song, and it removes the encrypted protection of the song once it is converted making it accessible to any devices.
Plus, once it is no longer protected you can keep the song as much as you want without worrying if your subscription is over. Sounds amazing right? If you want to try this wonderful tool, you can visit their official website and download its installer. Once you have it installed, you can follow the steps I provided below as your guide on how to use the software.
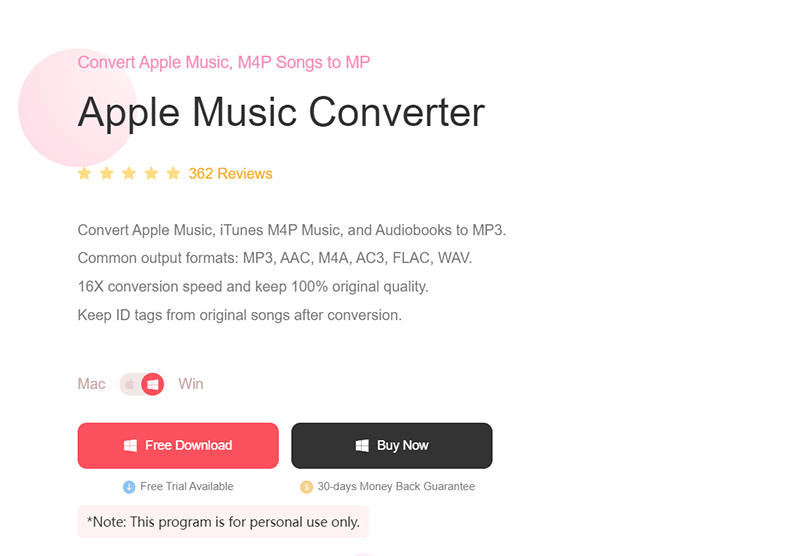
Step 1. Select The Tracks or Music from Your iTunes.
Launch AMusicSoft Apple Music Converter by clicking the shortcut on your desktop. It will automatically scan your music library once you run the software, it may take a few minutes depending on the size of your library. Once done, you may select the songs you wanted to convert.
Step 2. Choosing The Output Format and Path of Your Converted Songs.
Once done with the selection of songs, you may now set which output format you want or the one that is compatible with your device and also the location of the files once it is converted.
Step 3. Select The “Convert” Button to Start The Process.
After deciding which format to use and the location in which you can access it, click the Convert button to begin the conversion. You will never get lost how long the process will be because the status will be visible on its main interface. Once done, you can also view it in the Converted section.

After doing these steps, you can freely transfer your converted tracks to any devices by using Bluetooth or USB cable just like how to move iTunes Library to external hard drive.
Part 3. To Sum Everything Up!
Knowing how to move iTunes Library to external hard drive can really help you free some space on your local storage as well as by doing this your external hard drive will also serve as a backup of your iTunes Library.
Other than your external hard drive, you can also use any devices as storage for your iTunes library that’s why I included an additional tip in this post. I hope that by reading this post you gained information on how to move iTunes Library to external hard drive.
People Also Read
- How to Transfer Music from iPod to Computer without iTunes
- Solutions on How to Fix iTunes Song Greyed Out
- Easy Methods For Getting Your Own iPhone Custom Ringtone
- How to Transfer Music from iPod to Computer without iTunes
- How To Find The Top Played Apple Music Songs
- Easy Way On How To Get A Refund On iTunes Music
- How to Play iTunes on Android
- 2024 Best Apple Music And iTunes Converters (Windows & Mac)
Robert Fabry is an ardent blogger, and an enthusiast who is keen about technology, and maybe he can contaminate you by sharing some tips. He also has a passion for music and has written for AMusicSoft on these subjects.